As growers, we view the flowering stage as the main event. Everything built during vegetative growth, root mass, canopy structure, irrigation uniformity, gets pressure tested here. The plant shifts from structural expansion to reproductive output, redirecting energy toward resin production and flower formation.
Flowering is not just a light cycle change. It is a coordinated shift in irrigation strategy, nutrient balance, and environmental control. Small misalignments compound quickly during this phase. This guide breaks down flowering from a practical, week-by-week standpoint so you can understand what the plant is doing physiologically and how to steer it from first pistils through harvest with intention.
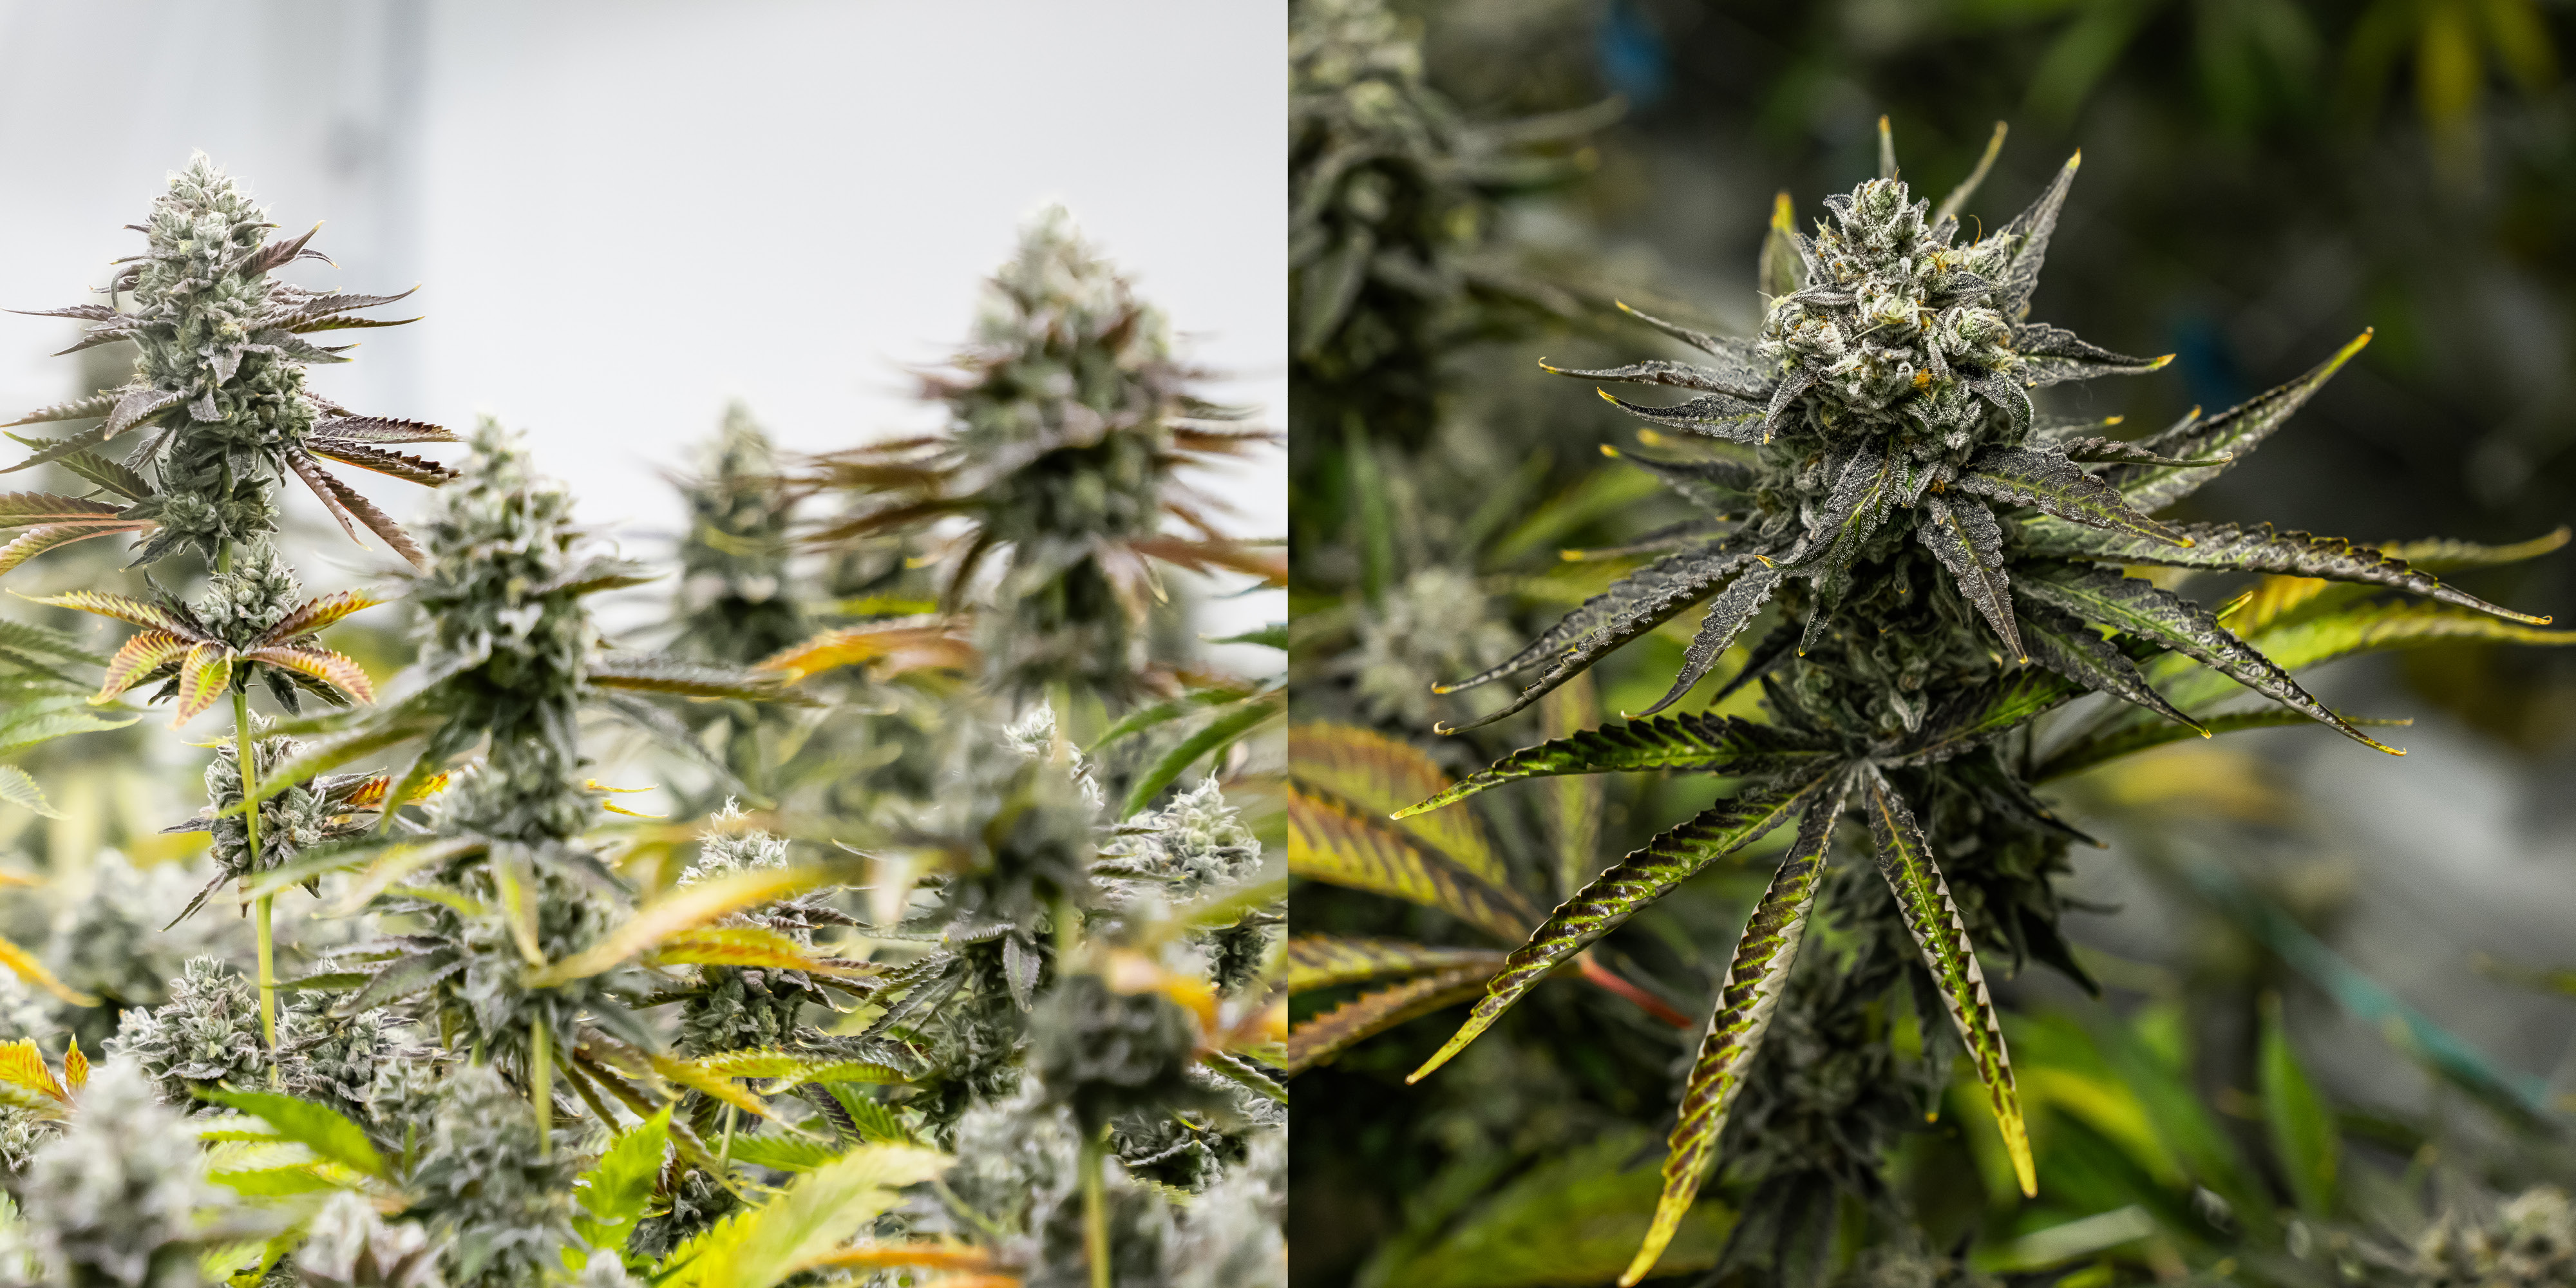
Understanding the Flowering Stages of Cannabis
The cannabis flowering stage is the reproductive phase of the plant’s life cycle. In nature, this occurs as days shorten in late summer, signaling the plant to reproduce before winter. In a controlled indoor environment, we trigger this hormonal shift artificially.
Unlike the vegetative stage, where the goal is size and structure, the flowering stage is about bud development and resin production. The plant stops producing new stems and leaves to focus energy on the female reproductive parts that form the buds.
During flowering, the plant shifts from building structure to allocating energy toward reproductive tissues. Carbohydrates produced in leaves are redirected toward developing bud sites. This increases overall demand for water, nutrients, and environmental stability. Small environmental inconsistencies that may have been tolerated during vegetative growth can now directly impact bud formation and final yield.
Photoperiod vs. Autoflowering:
- Photoperiod plants: These require a specific light cycle (12 hours of darkness) to trigger flowering.
- Autoflowering cannabis plants: These flower automatically based on age, usually around 3-4 weeks after germination, regardless of the light schedule. This guide focuses primarily on photoperiod plants, though the bud development stages remain similar.
When Does the Flowering Stage Begin?
The transition isn't instantaneous. It begins with the pre-flowering stage, where the plant shows its first signs of gender maturity.
- The 12/12 Flip: Indoors, the flowering stage officially begins when you switch your lights to a cycle of 12 hours on and 12 hours off. This uninterrupted darkness allows the buildup of flowering hormones (florigen).
- Signs of Flowering: Within 1–2 weeks of the flip, you will see the first signs of flowering. Female cannabis plants will produce white pistils (stigmas) at the nodes (where branches meet the main stem). If you see pollen sacs instead, you have a male plant which must be removed immediately to prevent pollination and seedy buds.
Week-by-Week Cannabis Flowering Timeline
The flowering stage typically lasts 8–10 weeks, depending on the cultivar. We break this down into three distinct phases: Stretch, Bulk, and Ripen.
Week 1–3: The "Stretch" and Transition (Generative Phase)
During the first few weeks after the flip, the plant undergoes rapid vertical growth, often doubling in size. This is known as the "stretch."
- Plant Activity: The plant is rapidly expanding its structure to support future bud sites. Stems elongate, and internodal spacing increases.
- Nutrient Strategy (Generative Steering): During this phase, we often utilize Generative Steering, allowing for larger drybacks (letting the substrate dry out more between waterings), minimizing irrigation runoff and targeting higher runoff EC. This controlled stress signals the plant to stop stretching and start stacking bud sites.
- Grower Task: Apply Athena IPM foliar sprays during weeks 1–3. Stop spraying once actual buds form (around week 3) to avoid contaminating the flower. Utilize the appropriate application rate (preventative, curative, or infestation) depending on pest pressure.
- Environment: Keep conditions similar to late vegetative growth during the first one to three weeks of flower, with a slightly warmer range of 78°F to 82°F and relative humidity between 60% and 72%. Maintaining steady temperature, humidity, and airflow during this transition helps reduce stress as plants adjust to the new light cycle and shift into reproductive growth.
- Canopy Management: Install trellis netting early while plants are still small so they can grow up and through it as they stretch. Not all cultivars stretch equally. Some indica-dominant varieties may increase in height by 30–50%, while sativa-leaning genetics can double or triple in size. Managing canopy height during this phase prevents later light intensity imbalances and airflow issues deeper in the canopy.
- Managing Stress: When applying generative pressure, monitor the top of the canopy for early signs of stress, such as slight yellowing, leaf edge curl, or distorted new growth. If these symptoms appear, irrigate to runoff to help stabilize the root zone and reduce light intensity temporarily. This allows the plants to recover and resume healthy development without compounding stress.
Week 3: Maintenance and Structure
By week 3, the stretch typically slows, and distinct "button" sized buds form at the nodes.
- Deleafing: Remove large fan leaves that shade the lower bud sites. This improves light penetration and airflow.
- Lollipopping: Remove the bottom 20-30% of the plant, including small branches and lower bud sites that receive minimal light. This helps redirect growth toward the upper canopy, reducing the development of airy, underdeveloped lower buds and improving overall flower uniformity
Week 4–6: The Bulk Phase (Vegetative Steering)
This is the peak of bud growth. The plant stops growing vertically and focuses entirely on fattening the flowers.
- Plant Activity: Calyxes swell, and white pistils stick out straight. Resin production ramps up as trichomes begin to form.
- Nutrient Strategy (Vegetative Steering): We switch to Vegetative Steering here. Increase irrigation frequency to maintain higher moisture content in the substrate, reducing overnight dryback, and forcing more run off through irrigation events. This lowers the osmotic pressure, allowing the plant to take up maximum water and nutrients to fuel rapid cell expansion and bud swelling.
- Environment: Begin gradually lowering daytime temperatures and humidity to reduce the risk of bud rot and preserve flower quality. Excess heat can impact terpene retention and overall finish. Aim for 75°F to 80°F with relative humidity between 60% and 70%, while maintaining consistent airflow throughout the canopy.
- Grower Task: Minimize environmental stress during this period. Stable temperature, consistent irrigation, balanced nutrition, and proper airflow all support steady bud development. The objective is to keep plants healthy and uniform so they can build flower mass without setbacks from avoidable stress.
Week 7–8: Ripening and Trichome Development
The buds have reached their maximum size, and the focus shifts to maturity and potency.
- Environment: Lower room temperatures during late flower to help preserve quality. Keep humidity in check as buds become denser, since higher moisture levels increase the risk of bud rot. Target 65°F to 72°F with relative humidity between 50% and 60%, and reduce humidity by an additional 5 to 10 percent if plants are producing very large, dense buds. Maintain steady airflow to prevent stagnant pockets within the canopy.
- Visual Changes: The white pistils begin to darken to orange or brown and curl inward. The plant stops producing new calyxes and focuses on resin.
- The Fade: You may notice lower fan leaves turning yellow or purple. This is natural senescence as the plant uses up stored nitrogen.
- Nutrient Taper: Begin to reduce nutrient input. We recommend switching to a finishing agent (like Athena Fade) to remove nitrogen while maintaining Calcium and micro-elements, ensuring the buds ripen without nutrient deficiency.
Nutrients for Flowering Cannabis Plants
Flowering plants have different metabolic demands than those in the vegetative stage. As the plant shifts from structural expansion to bud production, nutrient priorities change.
- NPK Shift: As vertical growth slows, Nitrogen demand gradually decreases, while Phosphorus and Potassium demand increases to support flower formation, cell expansion, and overall density. Transitioning to the bloom recipe in the Blended or Pro Line program provides the higher levels of P and K needed during peak bud development. Calcium and Magnesium should remain consistent throughout flower, as they play critical roles in cell wall integrity, photosynthesis, and overall plant structure.
- The Finish: In the final two weeks, reducing or removing Nitrogen from the feed can support natural senescence and ripening. Excess Nitrogen late in flower may delay maturation and impact final quality. Using a nitrogen-free finishing product such as Fade helps maintain key structural nutrients like Calcium while allowing the plant to redirect resources toward resin development. This shift encourages Nitrogen to dissipate from leaf tissue, which is visible as a natural fade in the fan leaves. In some cultivars, this transition may also enhance the expression of purple coloration.
- Root Zone pH: Maintaining a stable feed pH between 5.8 and 6.2 helps ensure nutrients remain available for uptake throughout flowering. Large swings in pH can disrupt nutrient availability and lead to lockout of key elements such as Calcium, Magnesium, or certain micronutrients.
Environmental Control
Environmental control during flower goes beyond simply setting temperature and humidity targets. As plants move deeper into the flowering phase, small shifts in climate can significantly impact bud development, resin production, and overall plant health. Dialing in Vapor Pressure Deficit, managing day-to-night temperature transitions, maintaining proper air exchange, and understanding the role of CO₂ all contribute to consistent results.
Vapor Pressure Deficit (VPD)
Vapor Pressure Deficit describes the difference between the moisture inside the leaf and the moisture in the surrounding air. In practical terms, it determines how efficiently the plant can transpire and move water and nutrients from the root zone into developing buds.
General VPD targets during flower:
- Early flower: ~1.0 to 1.2 kPa
- Mid flower (bulk): ~1.2 to 1.4 kPa
- Late flower: ~1.3 to 1.5 kPa, while lowering humidity to reduce disease pressure
When VPD is too high, the air is very dry relative to the leaf. This increases transpiration pressure and can cause excessive water loss, leaf edge stress, and slowed bud expansion. When VPD is too low, the air is too humid, slowing transpiration and nutrient movement. In flowering, poor transpiration combined with high humidity increases the risk of mold and bud rot.
Maintaining a consistent VPD range helps ensure steady nutrient transport and uniform bud development across the canopy.
Nighttime Temperature Drop and Dew Point
The difference between day and night temperatures influences metabolism, respiration, and structural development.
Recommended ranges:
- Daytime mid-flower: 75°F to 80°F
- Nighttime mid-flower: 68°F to 72°F
- Late flower nights: 65°F to 70°F
A moderate nighttime drop of 5 to 10°F helps regulate respiration and supports tighter flower structure. If nights remain too warm, respiration increases and plants may consume stored carbohydrates that would otherwise support bud development.
However, lowering nighttime temperatures too aggressively while keeping humidity the same can create a separate issue: dew point.
Dew point is the temperature at which air becomes saturated and moisture condenses. If nighttime temperatures drop close to the dew point, condensation can form on leaf and bud surfaces. This free moisture significantly increases the risk of bud rot and mold, especially in dense canopies.
For example, if relative humidity remains at 60% but nighttime temperature drops sharply, the dew point may approach leaf surface temperature. Even if room humidity seems acceptable, localized condensation inside dense flowers can occur.
To prevent this:
- Reduce humidity proportionally as nighttime temperatures drop
- Maintain steady airflow within the canopy
- Avoid drastic overnight temperature swings
Environmental stability is more important than dramatic temperature reduction.
Air Exchange and Airflow
Air exchange plays a critical role in maintaining stable temperature, humidity, and CO₂ levels.
General guidelines:
- Ensure consistent fresh air exchange in non-sealed rooms
- In sealed rooms, maintain proper dehumidification capacity
- Keep horizontal airflow moving across and through the canopy
As buds swell, internal canopy humidity rises. Without sufficient air movement, microclimates can form inside dense flowers. This creates ideal conditions for bud rot to develop from the inside out.
Airflow should gently move leaves without causing wind burn. The goal is uniform climate distribution, not direct blasting.
CO₂ Influence During Bulk
Carbon dioxide is a key driver of photosynthesis. During the bulk phase, when bud expansion is most rapid, demand for carbohydrates is high.
Typical targets:
- Ambient CO₂: ~400 ppm
- Supplemented environments: 800 to 1,200 ppm under high light intensity
CO₂ supplementation is most effective when:
- Light intensity is adequate
- Temperature supports increased metabolic activity
- Irrigation and nutrient availability are stable
Elevated CO₂ without proper environmental alignment will not improve performance. All variables must work together for plants to efficiently convert additional carbon into biomass.
Environmental control during flowering is about precision and balance. Proper VPD ranges, controlled nighttime temperature drops, humidity management to avoid dew point issues, adequate air exchange, and aligned CO₂ levels all work together to support healthy, uniform bud development while minimizing disease risk.
Managing Bud Growth and Density
Density comes from a combination of light intensity, genetics, and proper steering.
- Light Penetration: Dense buds require consistent, adequate light intensity throughout the canopy. If light does not reach the lower sections of the plant, lower buds will remain underdeveloped and airy. Ensuring even light distribution supports more uniform flower development from top to bottom.
- Support: Use a trellis net. Heavy colas that are not supported can cause branches to snap. Trellising also spreads the canopy so every bud gets equal light.
- Preventing Rot: Bud rot (Botrytis) destroys dense colas from the inside out. It is caused by stagnant air and high humidity. If you see brown, mushy spots on your buds, remove the infected area immediately and lower your humidity.
Late Flowering and Signs It’s Time to Harvest
Knowing when to harvest is an art. Harvesting too early results in low potency and a racey high; harvesting too late leads to a sleepy, "couch-lock" effect as THC degrades to CBN.
- Pistils: Wait until 70–90% of the white hairs have turned orange/brown and curled in.
- Trichomes (The Gold Standard): Use a jeweler’s loupe (60x) to look at the resin glands on the buds (not the leaves).
- Clear: Immature.
- Cloudy/Milky: Peak THC.
- Amber: Over-mature (sedative).
- Target: We generally recommend harvesting when trichomes are mostly cloudy with very few amber heads for maximum potency and flavor.
Harvesting Cannabis: Timing, Drying, and Curing
Once you confirm maturity, the flowering stage ends, and the post-harvest process begins.
- Cut: Cut the plant at the base or branch by branch.
- Dry: Hang the plants in a dark room at 60°F and 60% humidity for 10–14 days. This slow dry preserves terpenes.
- Cure: Once the stems snap, trim the buds and place them in airtight jars to cure. Burp the jars daily to release moisture and break down chlorophyll.
Troubleshooting Flowering Problems
- Nutrient Burn: Burnt tips on leaves indicate your EC is too high. Increase irrigation runoff to reduce built up salts and/or lower your feed strength.
- Light Stress: If the top buds start bleaching (turning white) or "foxtailing" (growing weird spires), your lights are too close or too bright.
- Hermaphrodites: Stress (light leaks, temp swings) can cause a female plant to grow pollen sacs. Check your plants daily and remove any "nanners" (bananas) immediately to prevent seeds.
FAQs on Cannabis Flowering Stage
How long should cannabis be in the flowering stage?
- Most photoperiod strains require 8 to 10 weeks of flowering. Some Sativas can take 12+ weeks, while fast-flowering Indicas may finish in 7–8 weeks.
How often should I water during flowering?
- Watering frequency depends on your growing medium, container size, and overall plant demand. During peak flowering, typically around weeks four through six, plants use the most water and may require daily or multiple irrigations per day in media such as coco or rockwool. If you are using substrate sensors, follow the Precision Irrigation Strategy to guide irrigation timing based on moisture content and dryback trends. If hand watering, follow the hand-watering strategy outlined in the Athena Handbook to maintain consistent saturation, controlled drybacks, and stable root zone conditions.
When to remove fan leaves?
- Depending on plant density, perform a moderate to heavy defoliation around Day 21 to 28 of flower. If the canopy remains dense, a second defoliation may be necessary around Day 42. Avoid removing excessive foliage. Focus on leaves that block light to key bud sites or restrict airflow and create humidity pockets within the canopy.
What nutrients do flowering cannabis plants need?
- They need a base nutrient rich in P and K, calcium, magnesium, and micronutrients. Avoid high Nitrogen after week 4.
Why are my buds small during flowering?
- Small buds can result from several factors. Insufficient light intensity, uneven canopy structure, nutrient imbalance, or environmental stress during early flower can all limit bud development. Excessive stress during the stretch phase may also reduce final bud size. Genetics also play a role, as some cultivars naturally produce smaller, tighter flowers while others form larger colas.
Why are my leaves turning yellow in flower?
- Leaf yellowing during late flower can be part of natural senescence as the plant redirects nutrients toward developing buds. However, early or aggressive yellowing may indicate nutrient imbalance, pH instability, or root zone issues. Timing matters. Yellowing in the final weeks is often expected, while significant yellowing early in flower may require evaluation of irrigation practices and nutrient levels.
What causes bud rot during flowering?
- Bud rot is typically caused by high humidity, poor airflow, and dense flower structure that traps moisture. Large buds with limited internal airflow are especially susceptible. Rapid nighttime temperature drops without corresponding humidity adjustments can also increase condensation risk inside the canopy. Maintaining consistent airflow, stable environmental conditions, and appropriate humidity levels throughout flower helps reduce the likelihood of mold development.
By understanding the distinct phases of the cannabis flowering stage,from the initial stretch to the final flush, you can manipulate the environment and nutrition to steer your plants toward a heavier, more potent, and flavorful harvest.
Subscribe to our newsletter
Athena® exists to support the modern grower, no matter the scale. Our core principle is to formulate products that improve quality, reduce costs and drive consistency. Athena® was born in the grow rooms of Los Angeles, California, where we are always in pursuit of the perfect run. As the weight of being a cultivator increases, we exist to make the complex simple.
Related posts
.jpg)
Cannabis Pesticides: Regulation, Safety, and Responsible Use
%20(2).jpg)
Cannabis Nutrient Deficiencies: How to Diagnose, Fix, and Prevent Problems in Your Cannabis Plant
%20(1).jpg)
Cannabis Nutrient Lockout: What It Is and How to Fix It
